How to Integrate sCrypt Service
Before interacting with an existing sCrypt contract that exists on chain,
we must create an instance of the contract based on the latest state of the contract on chain. Such an instance can be created by calling the fromTx method. However, this means your application needs to track and record all contract-related transactions, especially for a stateful contract.
An easier alternative is to leverage sCrypt infrastructure service, which tracks such transactions, so you can focus on your application logic.
Get an API Key
Create account
Go to sCrypt.io to create your free account.
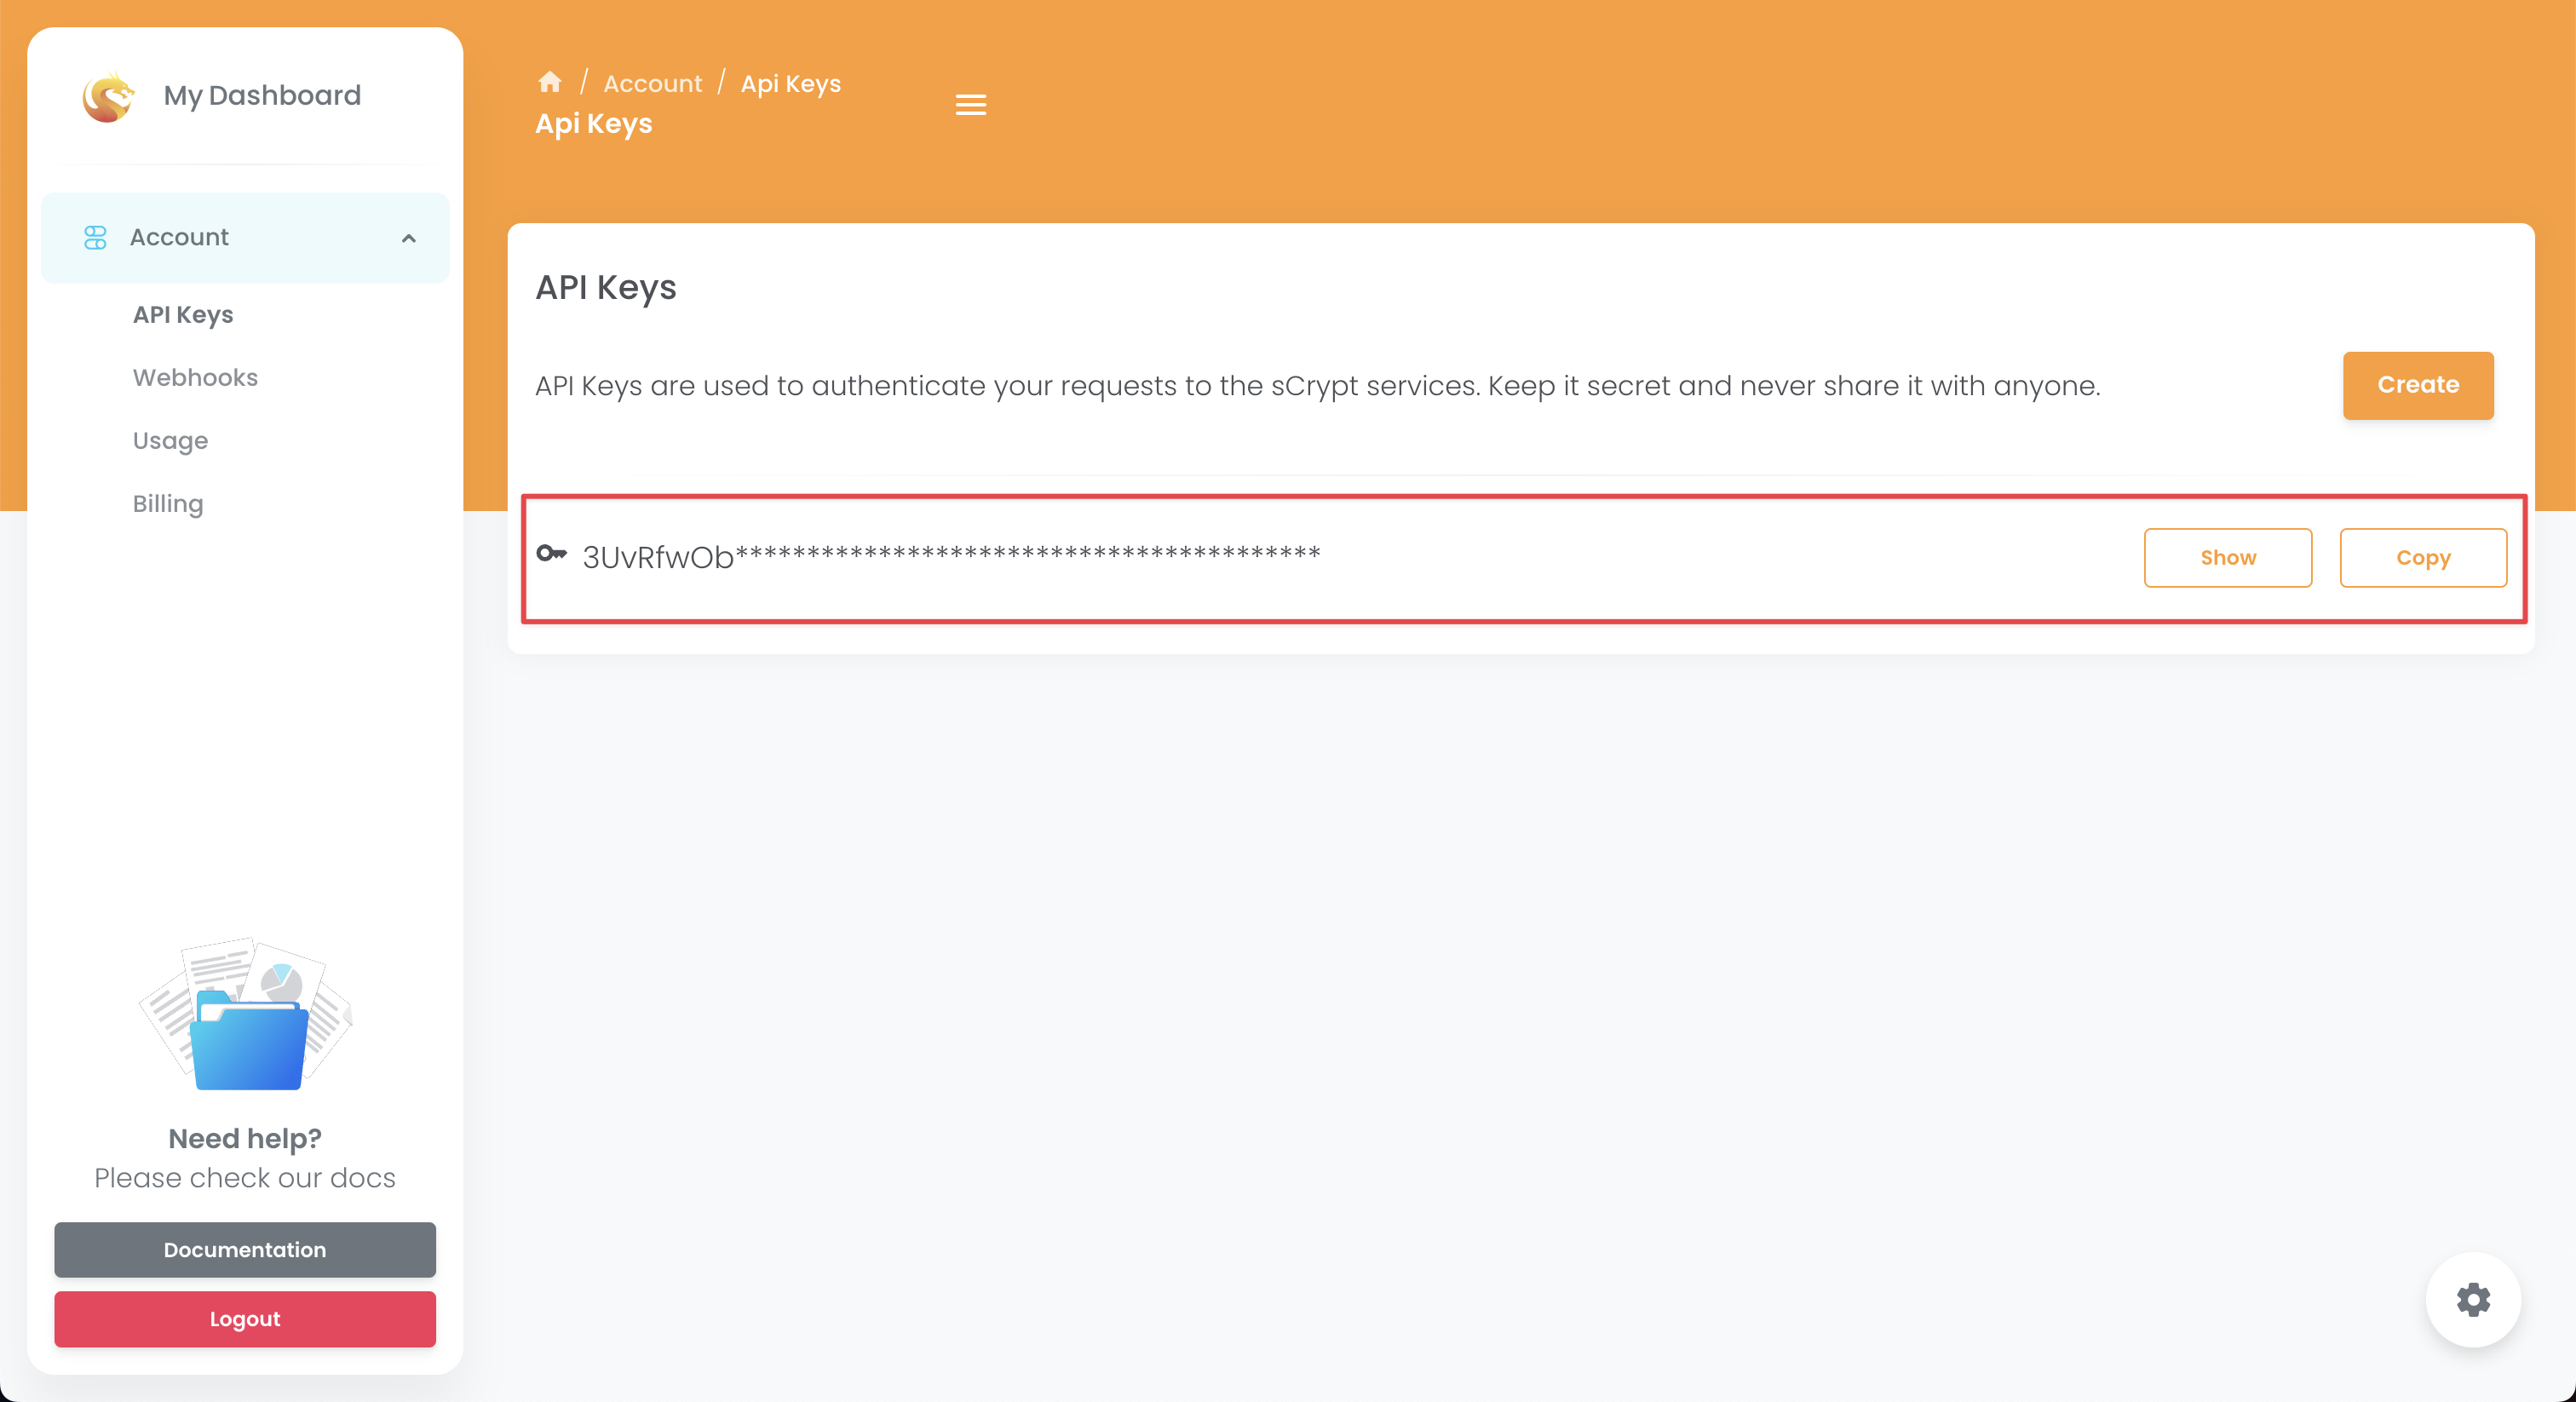
Get API key
Sign in and click Create to create a new API key. Click Copy to copy it.
Integration
Once you have an API key, you can easily integrate sCrypt service into your app by following these simple steps.
Step 1: Initialize Client
You can pass the API key, along with network, to the Scrypt.init function to initialize an sCrypt client in your app.
import { Scrypt, bsv } from 'scrypt-ts'

Scrypt.init({
  apiKey: 'YOUR_API_KEY',
  network: bsv.Networks.testnet,
})
Step 2: Connect a signer with ScryptProvider
Connect signer to ScryptProvider, the required provider to use sCrypt service.
const signer = new TestWallet(myPrivateKey, new ScryptProvider())
const counter = new Counter(0n)
// connect signer
await counter.connect(signer)
Step 3: Get Contract ID
Each contract is uniquely identified by the transaction that deploy it and the output it is in, which we regard as its ID.
const balance = 1
const deployTx = await counter.deploy(balance)
console.log('contract Counter deployed: ', deployTx.id)

const contractId = {
    /** The deployment transaction id */
    txId: deployTx.id,
    /** The output index */
    outputIndex: 0,
}
You can usually get the ID of a contract from its creator, who publicizes it so others can interact with it.
Step 4: Get Contract Instance
Once you have the contract ID, you can easily create a contract instance as follows.
const currentInstance = await Scrypt.contractApi.getLatestInstance(
  Counter,
  contractId
)

// connect signer
await currentInstance.connect(signer)
For a stateless contract, the instance points to the deployment tx; for a stateful one, it points to the latest tip in a chain of txs, which sCrypt service tracks automatically.
Interact with the Contract
Once you have the instance after following the steps above, you can easily read from the contract, write to it, and listen to it.
Read
You read an instance's properties using the dot operator, like any other object.
// read @prop count
console.log(counter.count)
Reading does NOT broadcast a transaction to the blockchain.
Write
To update a contract instance, you call its public method as before, which writes to the blockchain by broadcasting a transaction.
// call the method of current instance to apply the updates on chain
const { tx } = await currentInstance.methods.incrementOnChain()

console.log(`Counter contract called,  tx: ${tx.id}`)
Listen to Events
Often, your app needs to be notified when a contract gets called and updated. It is essential to be able to listen to such events in real time that can alert your app whenever something relevant occurs on chain. For example, in your front-end, you can refresh the web page to show the user the latest state of a contract, upon event notifications.
With the sCrypt service, you can easily subscribe to a contract's events by its contract ID, using ethier websockets (client side) or webhooks (server side) per your requirements.
Websockets
To use websockets to listen for contract events, just use the Scrypt.contractApi.subscribe dedicated API in our client SDK, which takes two parameters:
options: SubscribeOptions<T>: it includes a contract class, a contract ID, and a optional list of method names monitored.
interface SubscribeOptions<T> {
  clazz: new (...args: any) => T;
  id: ContractId;
  methodNames?: Array<string>;
}
If methodNames is set, you will be notified only when public functions in the list are called. Otherwise, you will be notified when ANY public function is called.
callback: (event: ContractCalledEvent<T>) => void: a callback funciton upon receiving notifications.
ContractCalledEvent<T> contains relevant information on how the contract is called:
methodName: string, which public method is calledargs: SupportedParamType[], arguments the public method is called withtx: bsv.Transaction, transaction where contract is called fromnexts: Array[T], includes the new contract instances created by this call. If a stateful contract is called,nextscontains the contract instances containing the new state generated by this call. You can read the latest state from the new contract instance to, e.g., display the new state to users. If a stateless contract is called,nextsis empty.
Below is an example of listening to events when incrementOnChain method is called.
const subscription = Scrypt.contractApi.subscribe({
  clazz: Counter, // contract class
  id: contractId, // contract id
  methodNames: ['incrementOnChain']
}, (event: ContractCalledEvent<Counter>) => {
  // callback when receiving a notification
  console.log(`${event.methodName} is called with args: ${event.args}`)
});
When using this API, you do not need any backend services of your own; the code usually runs in your users' browsers. There is a security issue because of exposure of your API key. So it’s highly recommended that you just use it in demo projects for trusted users.
Webhooks
There is an alternative for listening to contract events in a more secure and effective way. Just use our webhook service to push event data to your own backend service.
Webhook Management
First, you need to create a valid webhook in our service before trying to receive any event data. You can manage webhooks on the webhooks page of our dashboard.

To create a valid webhook, you need to provide the following information:
- Webhook URL
This is the specified URL of your backend service for receving the associated event data.
- Network
A webhook can only receive events from a single network. It must be either testnet or mainnet.
- Contract ID
A webhook must listen to a certain contract ID. In other words, it will be notified only when this contract is called on chain.
Please note that the contract can only be listened to if it is deployed and called using our SDK or services.
- Contract Artifact
A contract artifact is also needed to decode call data on chain. You can usually find it in the artifact folder of your sCrypt project. It is required if the contract ID was newly registered to our service. It becomes optional if it has been registered before. Also, you can only update artifacts registered first by you.
Besides adding webhooks in dashboard, you can add them programmatically.
const fs = require('fs').promises;
const util = require('util');

// Async function to read a JSON file
async function readArtifactFromFile(filePath) {
  try {
    // Read the file using fs.promises.readFile and await for the result
    const data = await fs.readFile(filePath, 'utf8');

    // Parse the JSON data
    const jsonData = JSON.parse(data);

    // Return the parsed JSON object
    return jsonData;
  } catch (error) {
    // Handle errors, e.g., file not found
    throw new Error('Error reading JSON file: ' + error.message);
  }
}


async function main() {
  try {
    // Provide the path to your JSON artifact file
    const artifactFilePath = 'path_to_your_json_file.json';

    // Fetch the JSON artifact data from the file
    const artifact = await readArtifactFromFile(artifactFilePath);

    const apiKey = '[Your API key]';
    const webhookUrl = 'https://api.scrypt.io/webhooks/create'; // Use 'https://testnet-api.scrypt.io' for testnet

    const requestBody = {
      url: 'http://127.0.0.1:3005/api/webhooks/test_notify',
      contractId: {
        txId: "1fa604263d2a16f6292f788e391b83ea7037fb9eb2ed0055ab5802ab2d090ef5",
        outputIndex: 0
      },
      desc: "test webhook",
      artifact: artifact // Use the fetched artifact data here
    };

    const response = await fetch(webhookUrl, {
      method: 'POST',
      headers: {
        "Content-Type": "application/json",
        "Authorization": `Bearer ${apiKey}`
      },
      body: JSON.stringify(requestBody)
    });

    if (!response.ok) {
      throw new Error('Failed to create webhook');
    }

    const responseData = await response.json();
    console.log(responseData);
  } catch (error) {
    console.error('Error:', error);
  }
}

// Call the main function to start the process
main();
Webhook Request and Response
When a contract is called on chain, we will push event data through a http POST request with a body like this to your webhook URL:
{
    "webhookId": "wh_EyY2zEnogmK9e57Q",
    "createdAt": "2023-07-24T04:00:32.246Z",
    "events": [{
        "eventType": "utxoSpent",
        "spentUtxo": {
            "txId": "966a3fb5d46c673ceaef2a476e828b75a6e6eae28839b36c0ff42cddc7a28f5b",
            "outputIndex": 0
        },
        "contractId": {
            "txId": "966a3fb5d46c673ceaef2a476e828b75a6e6eae28839b36c0ff42cddc7a28f5b",
            "outputIndex": 0
        },
        "spentBy": {
            "txId": "c359669cef68509d8357741e57bdff29f731c28643596d2c49f12dcd633e89f7",
            "inputIndex": 0
        },
        "createdInSpentTxOutputs": [
            0
        ],
        "id": "evt_6XnqNUIhoZJ6SaEg5sDGcC",
        "methodName": "vote",
        "args": [{
            "name": "name",
            "type": "bytes",
            "value": "6950686f6e65"
        }]
    }]
}
The request details the events data:
eventType: The type name of the event. Currently onlyutxoSpentavailable.spentUtxo: The specified utxo of the contract spent in the event.contractId: The contract ID that the event belongs to.spentBy: The specified input index of the contract call tx from which the event comes.createdInSpentTxOutputs: Newly generated contract utxo(s) in the spent tx if it's a stateful contract.id: Unique event id.methodName: The method name of the contract call of the event.args: The argument list of the contract call of the event.
You need to return a HTTP code of 200 for a successful acknowledgement. We will automatically pause the webhook after several unsuccessful deliveries. You need to manually reactivate it on the webhooks page before we start pushing notifications to it again. For a single event, there might be more than one notification pushed to the webhook, so make sure you have this situation handled.
Webhook Security
To keep your webhook requests secure, we add a signature header x-scrypt-signature for each request by signing the request data with your own API key using the HMAC-SHA256 algorithm. You can verify it if you want. It can be generated using code like this:
const signature = crypto.createHmac('sha256', apiKey).update(JSON.stringify(body)).digest('hex');
Webhook Limit
The number of webhooks that each user can create is limited. The following is the limit on the number of webhooks that users of different plans can create.
| Plan | limt on testnet | limt on mainnet |
|---|---|---|
| Starter | 10 | 10 |
| Pro | 100 | 100 |
| Business | 200 | 200 |
| Enterprise | 300 | 300 |